Collaborative mining: lift and haul a rock together#
The two shipped rockets pull one rock toward a delivery base. They now fly side-on in a downward gravitational field, so altitude is part of the job: an engine must spend thrust not only on hauling but also on keeping its rocket from falling. The useful question is not simply whether both engines are firing: are their forces helping the same journey? A rocket pulling across its partner’s path can stretch the connections and waste motion. Watch the rock, both tethers, the altitude, and the destination together.
This tutorial starts with the supplied Collaborative mining environment. You will inspect its connections, run a planner, compare one powered rocket with two, and learn what happens when cargo is delivered. For installation, begin with Getting started with the control laboratory; the other lessons are in Task tutorials.
Find the cargo, base, and hazards#
Choose Collaborative mining under Environment, then press ↺ to reset. The scene contains two controlled rockets and one passive cargo rock. The rock has mass 0.24 kg and linear drag 0.8; each rocket has mass 1 kg and maximum thrust 24 N. One upright rocket has enough thrust to lift the rock on its own. Cooperation provides additional force, provided both rockets help support the connected load.
The rockets start at [19, 10] and [19, 15], flanking the rock at [22, 12.5].
The delivery base is the circular zone centered at [12, 32], with radius 3 m.
With retention enabled by default, the rock’s center must enter the inner
1.5 m disk to register a delivery. Merely flying a
rocket into the base does not deliver its cargo.
The irregular outer boundary and central polygonal hole are collision geometry;
the preset uses physics.lethal_walls: false and rewards.wall_collision: 100.
Wall contact therefore costs reward without ending the world by default.
Downward gravity pulls the rockets and cargo toward lower altitude, so a rocket
that stops thrusting will descend; propulsion is needed to hold altitude while
hauling. The gravity well at [47, 22] attracts bodies too; it is a force
source, not another base. The direct starting journey is toward the nearby base,
away from the central obstacle. Later pursuit of respawned cargo can bring the
team into more awkward configurations. After reset, the whole arena is already
visible and the camera button reads Follow agent. Pressing it follows a
rocket and changes the label to Whole arena; press that to return to the
overview. Use Side / overhead to switch between the side view and overhead
inspection.
Moving the rock and lifting it are different jobs. In gravity mode, the supplied rock and two rockets weigh \((0.24 + 1 + 1)\times 9.81 \approx 21.97\) N, while their engines supply at most 48 N together. Pointing both engines upward leaves thrust available to accelerate the load. The engine supports lifting tethered cargo, and the default Rock weight → 1× now makes that physically possible.
Open the rock settings and inspect the thrust-to-weight readout. Use a lighter flight load stages a suitable Rock weight, sized for the weakest rocket or drone to carry one rock on its own while reserving 20% of its maximum upward thrust. The setting rounds down to the weight slider’s ticks. Press Apply and restart to use the staged value. The default 0.24 kg rock and one 1 kg rocket need about 12.16 N to hover, below the rocket’s 24 N maximum. This solo calculation excludes a second attached rocket: with its partner connected and unpowered, one upright engine has only about 2.03 N left above the full 21.97 N weight.
Rock size changes geometry independently of mass. Increasing hook stiffness reduces spring stretch; it does not add thrust. Point the thrust upward to lift: tilting spends some force sideways. Gravity wells, drag, tether angles, and the planner’s actions still shape the journey, so sufficient thrust alone does not guarantee an autonomous delivery.
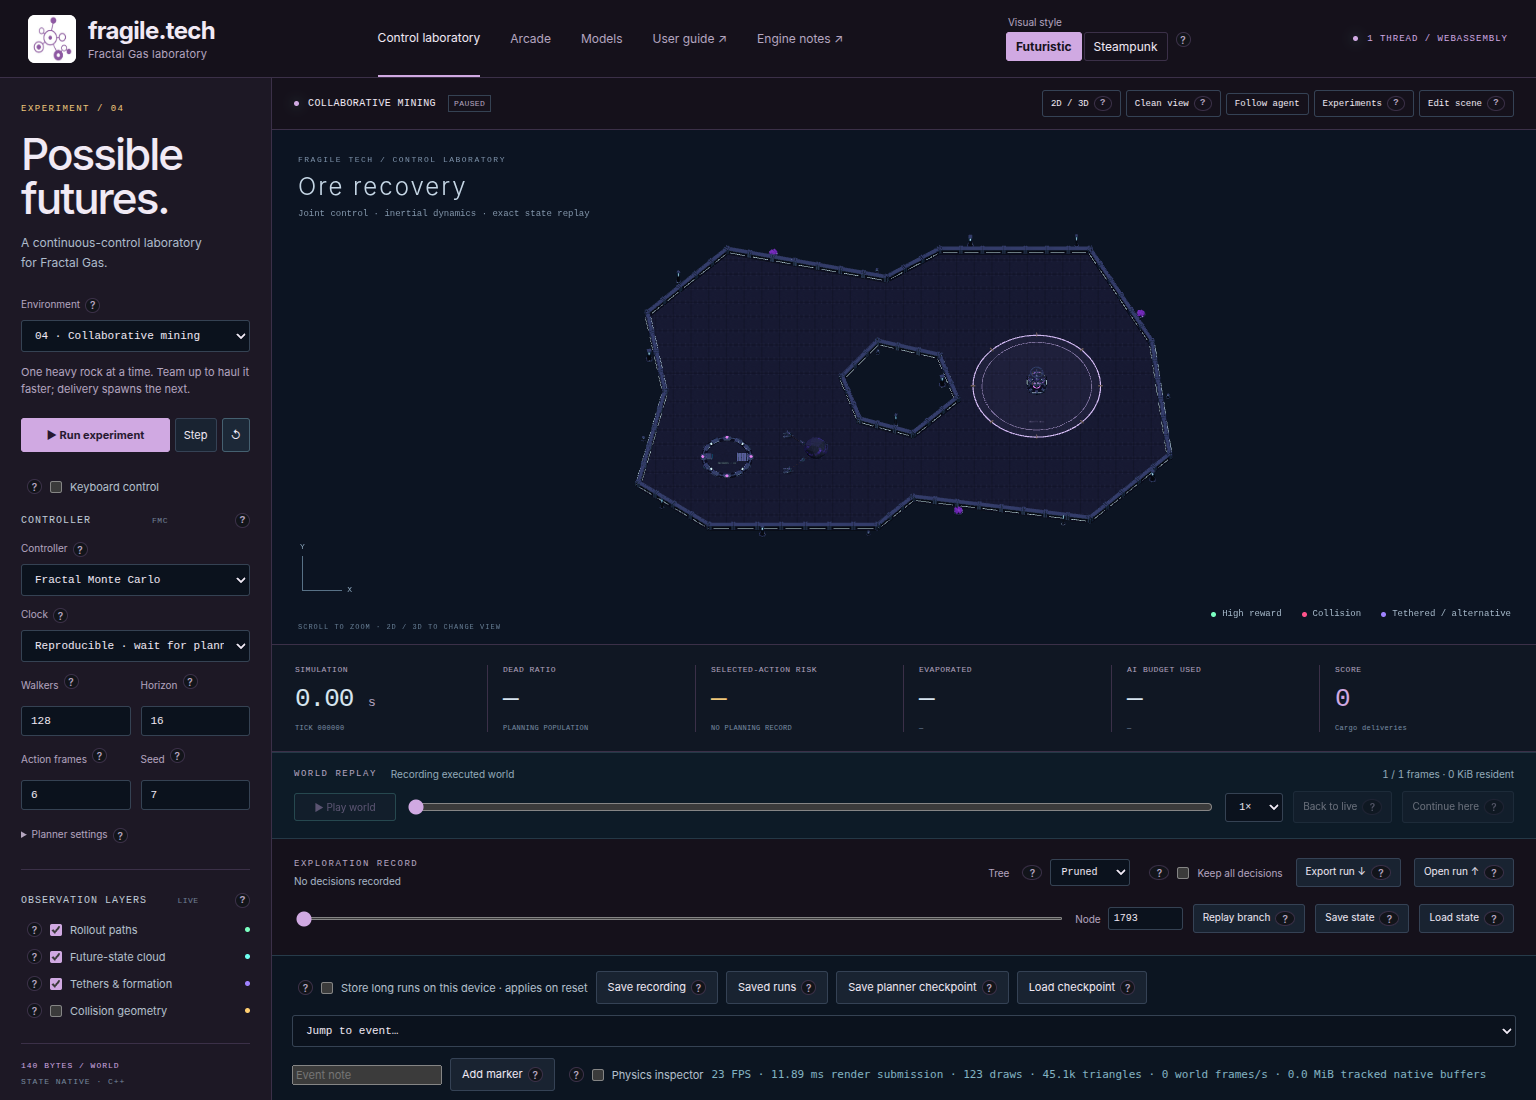
Fig. 11 The reset scene has one cargo rock and two connections. Identify the delivery base before watching the planner’s paths.#
Run and inspect your first decisions#
Use a reproducible starting configuration so that changes have a clear meaning. Changing these settings resets the current world and recording, so set them before collecting a trial.
Select Controller → Fractal Monte Carlo, Walkers → 128, Horizon → 64, Action frames → 6, and Seed → 7.
Select Clock → Reproducible · wait for planning and Worker threads → 1. The current UI defaults to four requested threads; explicitly choosing one removes that difference from this exercise. Wait for WEBASSEMBLY readiness.
Leave the other FMC settings at their defaults and press ↺. The preset and subsequent reset are paused. Check the two rockets and single rock against the overview.
Press Step once. This asks the planner for one joint action and applies it for six physics frames, or 0.1 simulated seconds at this scene’s 60 Hz rate. Look for a small change in positions and tether shape. One step is an inspection exercise, not a promised delivery.
Switch to overhead view. Compare the rock’s position with its starting position and the base, and check whether the rockets are losing altitude. Distinguish the bright executed bodies from candidate paths: the paths describe futures considered during planning.
Press Run experiment, watch several decisions, then Pause experiment. Check whether the cargo has approached the base, whether both connections remain present, and whether the delivery counter increased. Record the actual outcome, including stalled or unsuccessful runs.
Use WORLD REPLAY to inspect movement frame by frame. Press Back to live before resuming. See Controls, planners, and diagnostics for the planner diagnostics and Record, replay, and continue experiments for saving the observation.
Each walker represents a possible future for the whole three-body system. It is
not an extra physical rocket. Increasing Walkers gives the search more
candidates; it does not add towing force to the executed world.
The collaborative preset’s controller_defaults use horizon 64 (previously 32),
6 action frames, and 4 elites; solo remains at 32/6/4. The longer lookahead helps
plan coupled delivery, but does not guarantee success in every stochastic run.
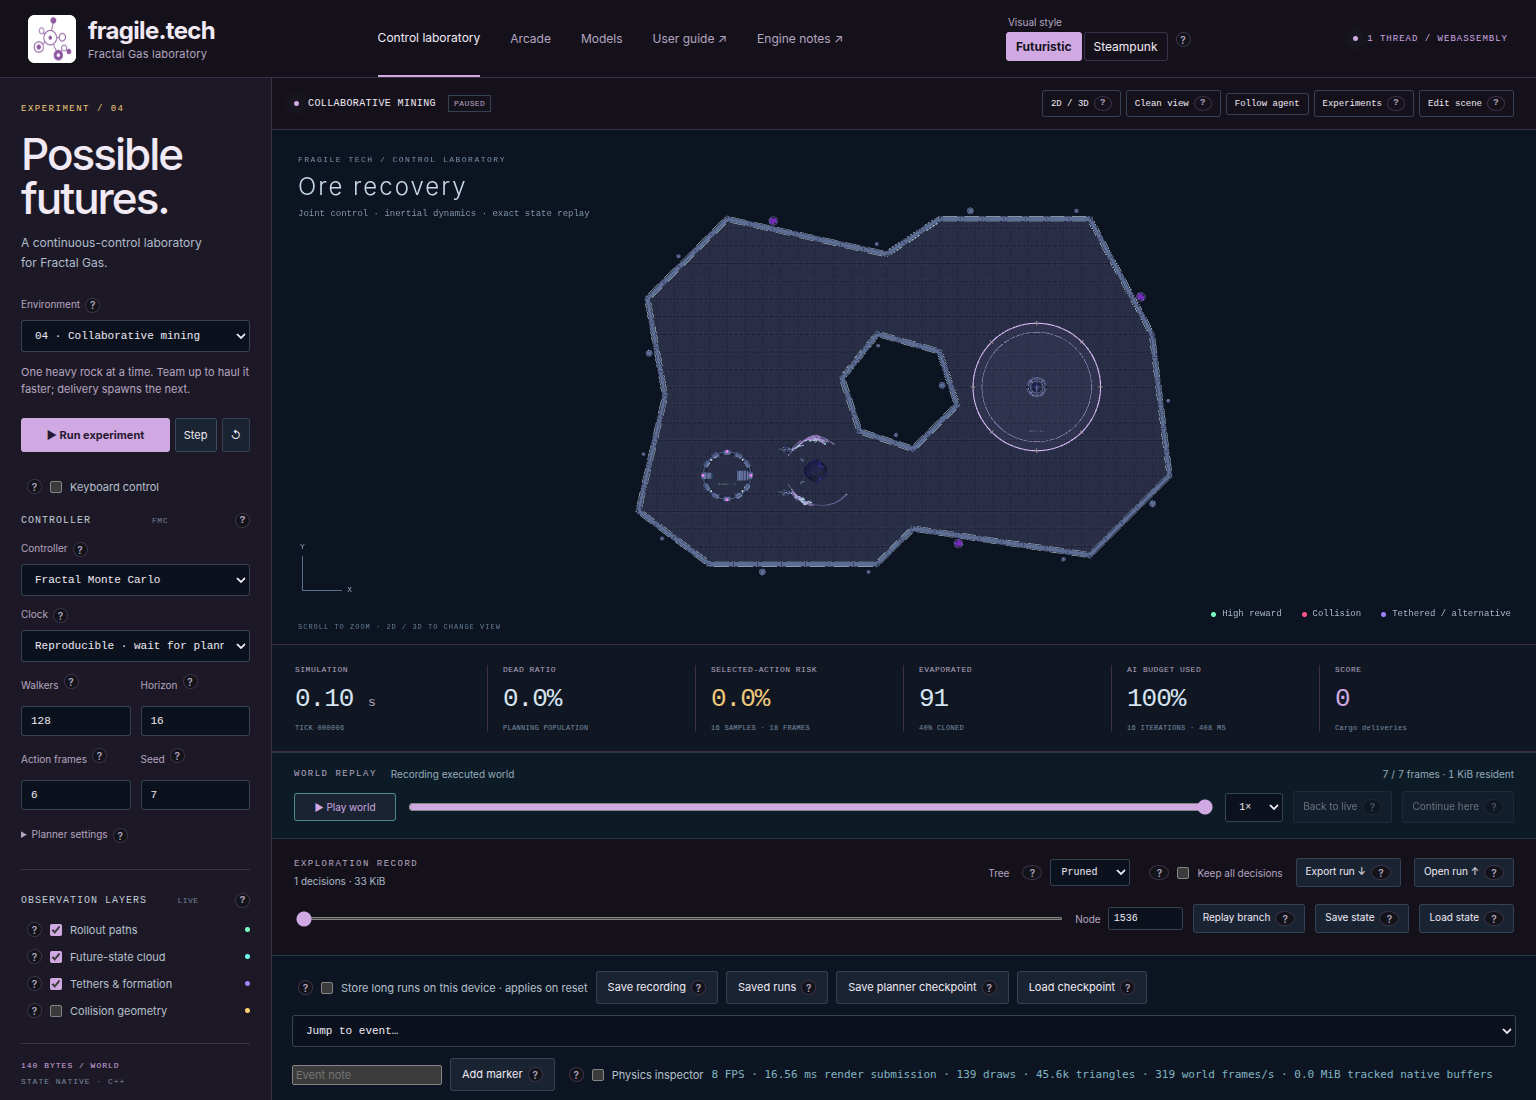
Fig. 12 After one Step, inspect the cargo and both tethers against the base. This capture illustrates an early decision, not a completed delivery.#
Understand attachment, strain, and respawning#
Both tethers are already connected at reset. Their JSON supplies rocket endpoints
a: 0 and a: 1, and cargo endpoint b: 2. Although they are marked
automatic: true, initial attachment comes from those explicit endpoints. The
initial rocket-to-rock distances are slightly greater than the 3.5 m hook range;
that does not invalidate an existing connection.
Each tether begins with rest length 3.5 m, stiffness 35, and damping 8. Think of a
spring with damping rather than a rigid bar: its current length can differ from
its rest length, and the resulting impulse affects both bodies. A connection can
break if the magnitude of its computed impulse divided by the physics substep
duration exceeds the configured force threshold. This
preset omits break_force, so the compiler default is 500 N. Hook range is not
a breaking distance.
Open the rock settings to change Hook stiffness · N/m for all tow hooks in the scene. The allowed range is 0 to 1,000,000 N/m; the supplied mining preset keeps its default of 35 N/m. A low positive value permits more stretching, like a rubber band. A high value makes the connection approximately fixed in length; it remains a spring, not an exact rigid constraint. At zero, the spring force vanishes but radial damping remains. Press Apply rock settings to use the new value: this restarts the scene paused, so compare trials from that restart. The same panel’s Rock size control spans 0.1× to 2×. Apply rock settings after changing the size too.
Stiffness resists changes in separation. It does not directly resist motion around the rock: a rocket can move tangentially while keeping nearly the same tether length. Increasing stiffness therefore cannot, by itself, cure orbiting.
When an automatic tether is disconnected, it searches for active cargo with its center strictly within 3.5 m of the rocket’s center. Reattachment sets a new runtime rest length to the current separation, with a minimum of 0.1 m. Therefore, a reacquired connection need not have the original 3.5 m rest length. There is no manual “grab” key: steer close enough and advance physics.
Collaborative mining and Asteroid harvesting both default to
keep_delivered_rocks: true, using the same native retention behavior as solo
mode. With retention enabled, the mining base has two
useful radii: the inner delivery disk has half the base radius (1.5 m), and the
outer release boundary has radius 3 m. When the rock’s center enters the inner
disk, the delivery counter increases and all towing hooks attached to the cargo
detach. The rock stays active and
collidable and continues moving under physics, but it is locked against hooking
and approach targeting until its center is strictly outside every outer delivery
zone. Passing back through the inner disk during that lock does not create
another delivery. Once the rock’s center is strictly outside every outer zone,
it becomes eligible for automatic hooking and approach targeting again. The physical hooks remain on
their rockets, so you must bring them back to the released rock.
Turn Keep delivered rocks off and press Apply and restart to restore
full-radius delivery and random respawn. Delivery then uses the full radius-3 m
base, increases the counter, and detaches all towing hooks from the cargo.
This preset’s respawn: true cargo is placed at a seeded random collision-free
position throughout the playable map, outside bases and clear of walls, holes,
and active bodies. The same cargo body is reused, with its configured initial
angle and zero linear and angular velocity. If 256 placement attempts find no
clear position, it stays delivered and inactive and retries on the next frame.
Compare one powered rocket with two#
Here is a short experiment that isolates a useful question: how does the cargo’s motion change when a second engine joins the first? Use equal simulated duration, not equal time spent clicking. This experiment measures initial displacement; the rockets initially point away from the base, so it is not a delivery recipe.
Reset the unchanged preset. Press Save state and keep the downloaded snapshot. This stores the same physical starting point for both trials.
Open Edit scene, choose an overhead view, and expand Actuator channels. Do not move or edit any entities. Editing the scene would change the experiment and can invalidate the snapshot’s scene fingerprint.
Set every channel to zero. Set body 0’s thrust to
1, leaving its torque at0. Keep both channels for body 1 at0.Press Apply action · 1 frame 30 times. This advances 0.5 simulated seconds. Watch the rock’s displacement and the asymmetry in the two tethers. Save an image or add an Event note such as “one engine, 30 frames” and Add marker.
Press Load state and choose the saved reset snapshot. Check that the original positions return. Explicitly set the sliders again: loading a world snapshot does not make slider positions part of the physical state.
Set thrust to
1for both bodies and both torque channels to0. Press Apply action · 1 frame exactly 30 times. Compare the cargo’s movement with the first trial, including direction and tether deformation.Export the run if you want both segments. The snapshot restoration marks a discontinuity in the recording; it is not physical travel back to the start.
This compares one powered rocket with two in the same connected system. The unpowered rocket still has mass, drag, gravity, and a tether; it has not been removed. In the one-engine trial, the powered rocket also has to spend thrust to maintain altitude, so some of its force is not available for hauling. Do not infer a universal speed ratio from this brief transient. Turning, connection geometry, drag, gravity, altitude control, and collisions all matter over a longer journey.
For freehand practice, enable Keyboard control, choose Select & move, and click a rocket without dragging it. Click away from form fields before using W for forward thrust and A/D for turning. S clamps to zero on these forward-only vector rockets; it does not reverse them. Keyboard control targets the selected body, or the first controlled body when none is selected. Selecting the passive rock will not steer a rocket. To command both rockets simultaneously, use the full slider vector. Releasing all keys stops manual time advancement; apply zero-input frames if you want to observe coasting.
Measure deliveries and preserve the evidence#
Use cargo deliveries as the task outcome. The native harvest model counts
deliveries separately, with no delivery bonus. It forces delivery, collision,
pickup, gate, formation, and hooked_rock_distance rewards to zero.
The configurable rewards are progress, distance_squared, catch, and
wall_collision; the shipped mining preset uses 1, 0, 10, and 100 respectively.
Catch rewards apply on each catch,
including reacquisition after a break. Positive reward can therefore occur
before any delivery.
Open Rewards → Wall collision penalty to set rewards.wall_collision
from 0 to 10,000, with default 100. Press Apply to current run to change it
live while preserving the current state. This setting applies to every Control
Lab task, including harvesting, mining, and imported older scenes. The separate
rewards.collision term now covers only vehicle/body contacts; the harvest model
still disables that reward term.
Each controlled vehicle touching an outer wall or a hole boundary costs one wall penalty per physics frame. Staying against a wall costs the penalty again on every frame; corners and repeated contacts across physics substeps add no extra charge for that vehicle in the same frame. Passive cargo and hooks cause neither wall penalties nor wall deaths. Retained rocks keep their existing physics behavior.
To make wall contact terminal, enable Setup → World physics → Die on wall
collision, which sets the existing physics.lethal_walls field, then press
Apply and restart. Any controlled vehicle touching a wall or hole boundary
then ends the whole world, and the wall penalty is still charged on that death
frame. Every shipped preset starts with wall death off and wall penalty 100;
an older imported scene’s explicit lethal_walls: true is still honored.
Older scenes without a wall reward setting receive the new default of 100 for future or resimulated rewards. Historical stored records are not rewritten, and the snapshot layout is unchanged.
When attached, progress measures the rock’s center-to-base-center distance.
When unhooked, it measures the physical hook’s distance to the nearest eligible
rock; retained rocks under the delivery lock are excluded. Moving closer earns
progress reward, while moving away loses it. The optional distance_squared
term rewards mean squared vehicle displacement per physics frame in any
direction; it is disabled in the shipped mining preset.
Each physics frame measures progress toward the target selected at that frame’s start, using that same target before and after movement. Breaking a tether therefore does not earn a bonus merely by switching from the distant base to a nearby rock. The next frame can select a new target for the disconnected rocket.
For a controlled benchmark, open Experiments with this scene selected, leave All preset scenes unchecked, and explicitly select Success metric → Cargo deliveries and Success target → 1. Check these fields even if you previously used a different task. Set Population → 128, Lookahead · actions → 64, and Action duration · frames → 6 to match the live baseline; the dialog has its own defaults. Choose seeds and an episode limit before comparing controllers, and report that limit alongside results. A trial that runs out of frames without a delivery has not met this goal, even if its reward improved. The benchmark also requires a nonterminal world at success. Details are in Experiments, comparisons, and performance.
Pause and Export run to preserve executed motion and retained planning records. Use Jump to event… to inspect a delivery marker if one occurred. Saving a snapshot preserves a restart point, while exporting the run preserves the trajectory that explains the result. Keep the same scene and record your clock and thread selection separately.
Recover from common problems#
If the rock barely moves, inspect the actual thrust direction, altitude, and whether both rockets are helping. Each rocket must also counter downward gravity; increasing planner population does not increase engine strength. If a connection disappears, inspect for a delivery or force-induced break, then approach the active cargo within hook range. Advancing physics is necessary for reacquisition.
If the rockets orbit rapidly, check Movement reward and press Apply settings after setting it to zero. A positive value rewards displacement in any direction, including circling without hauling cargo. Zero removes that incentive; it does not remove existing tangential velocity or guarantee that a finite search finds a useful pull. Inspect the cargo’s progress toward the base and compare hook stiffness from the same paused starting state. A tighter spring can keep a rocket close to the rock while it continues to circle.
If delivery stays at zero, inspect the cargo’s center rather than a rocket’s
position or an attractive search path. By default, delivery uses the inner
1.5 m disk. A delivered rock remains active, collidable, and moving under
physics; the delivery lock does not physically freeze it. Once its center is strictly
outside all outer delivery zones, bring a hook within range to reacquire it.
Turn Keep delivered rocks off and press Apply and restart for full-radius
delivery and random respawn instead.
If the world becomes terminal, inspect the last frames and scene settings and
reset before retrying. The preset’s wall collisions are not lethal, but enabling
Die on wall collision or importing a scene with lethal_walls: true makes
either rocket’s wall contact end the whole world.
If keyboard input fails, check focus, selection,
and Keyboard control before changing the scene.
For a modified course, follow Scenes, agents, and the editor and consult Scene JSON reference for tether, cargo, gravity, and reward fields. Save the original scene and change one property at a time: otherwise you cannot tell which change improved the haul.